Mastering Garage Floor Leveling: A Guide to Seamless Surfaces
Ensuring your garage floor is level is crucial for both aesthetics and functionality. Uneven surfaces can cause issues with vehicle stability, hinder storage solutions, and even lead to safety hazards. Whether you’re planning a full renovation or simply want to improve your garage’s usability, mastering garage floor leveling is a fundamental skill. Here’s a comprehensive guide to help you achieve a seamless surface.
1. Assess the Current State:
Before diving into leveling procedures, assess the condition of your garage floor. Identify high and low points, cracks, and any existing damage. Understanding the extent of the unevenness will guide your leveling approach.
2. Choose the Right Leveling Method:
Depending on the severity of the unevenness and your budget, several methods can be employed for garage floor leveling:
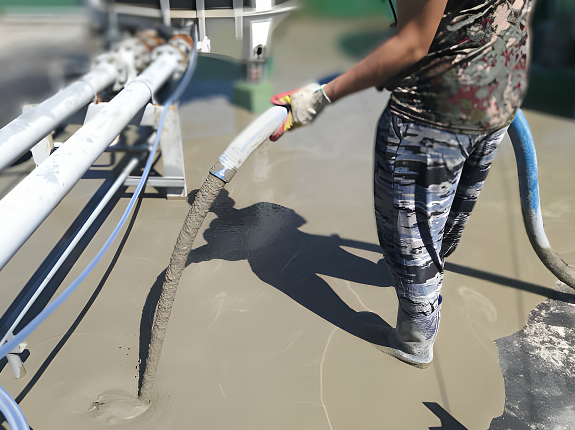
Self-leveling concrete: Ideal for minor imperfections, self-leveling compounds spread evenly to create a smooth surface.
Concrete resurfacer: Suitable for moderate irregularities, resurfacers can fill small cracks and level the floor.
Grinding or milling: Effective for high spots, grinding removes excess concrete to achieve uniformity.
Mudjacking: This method is used for significant level discrepancies, involving pumping a mixture of soil, cement, and water beneath the slab to raise it.
3. Gather Necessary Tools and Materials:
Equip yourself with the tools required for the chosen leveling method. Common tools include a concrete mixer, trowels, leveling compound, grinder, safety gear, and appropriate footwear.
4. Prepare the Surface:
Clean the garage floor thoroughly, removing all debris, oil stains, and loose material. Repair any cracks or damage using a suitable concrete patching compound. A clean and smooth base ensures better adhesion and a longer-lasting result.
5. Follow Application Instructions:
Whether using self-leveling compounds, resurfacers, or other materials, carefully follow the manufacturer’s instructions. Mix the compounds to the correct consistency, apply them evenly, and work efficiently to avoid premature drying or setting.
6. Ensure Proper Drying and Curing:
Allow sufficient time for the leveling material to dry and cure according to the product guidelines. This step is crucial for achieving optimal strength and durability. Avoid heavy traffic or placing heavy objects on the newly leveled surface until it’s fully cured.
7. Finishing Touches:
Once the leveling material has cured, inspect the surface for any imperfections. Minor adjustments can be made using a grinder or by applying additional leveling compound as needed. Finally, consider applying a protective sealant to enhance durability and ease of maintenance.
8. Regular Maintenance:
To preserve the integrity of your leveled garage floor, practice regular maintenance. Keep the surface clean, promptly address any spills or stains, and inspect for signs of wear and tear. Routine maintenance will prolong the lifespan of your garage floor and ensure continued functionality.
Conclusion:
aklevelandpolish Achieving a level garage floor is essential for maximizing its usability and longevity. By following the steps outlined in this guide and selecting the appropriate leveling method for your needs, you can transform an uneven surface into a seamless foundation for your garage activities. Whether you’re a DIY enthusiast or prefer professional assistance, mastering garage floor leveling is a worthwhile investment in your property’s value and convenience.
895 Don Mills Rd. Suite 900, Toronto, ON M3C 1W3 Phone
+1 647 710-5034